How do I set up a custodial crypto wallet?
Looking to find out how to set up a custodial cryptocurrency wallet? Check out our easy-to-follow guide on choosing and setting up a custodial wallet.
Read this article →New to Solana? First you’ll need a Solana wallet—both to manage your Solana-based assets like SOL, and to interact with the Solana blockchain and the various apps built on it.
Solana is a high-performance blockchain platform designed to support scalable, user-friendly financial services and other applications.
Solana launched in 2020 as a faster and cheaper alternative to Ethereum, while still providing similar functionality. Like Ethereum, Solana is a “programmable” blockchain, meaning it supports smart contracts (self-executing bits of code) and a complex programming logic. In other words, developers can build decentralized apps (DApps) on either platform.
That said, there are some key considerations that might sway developers toward one platform over the other:
Ethereum prioritizes security and decentralization
Ethereum currently processes only ~15 transactions per second (network upgrades are underway, but they should take several years to complete). Ethereum is also often congested—due to high demand and low network capacity—resulting in high fees that range from a few dollars up to hundreds of dollars during peak congestion. By design, Ethereum values maximum decentralization over speed.
Solana prioritizes scalability and speed
Solana processes up to ~65,000 transactions per second, and its network fee (or “gas fee,” charged to cover the computing costs associated with transacting on the network) is comparatively cheap, averaging about $0.0002 USD. Solana is able to achieve this throughput with network architecture that’s not quite as decentralized as Ethereum’s.
Solana excels at providing quick, cheap transactions, which are crucial for use cases like high frequency trading, gaming, decentralized social media, and other DApps that handle high transaction volume. Solana’s speed and affordability makes it more user-friendly for people exploring the world of Web3.
To interact with any blockchain network, and the apps built on it, you’ll need to use a crypto wallet—sort of like your ticket to Web3. Crypto wallets are often network-specific, meaning you’d use a Bitcoin wallet to connect to the Bitcoin network, an Ethereum wallet to connect to Ethereum, and so on (although multi-chain wallets are becoming popular). To interact with Solana, then, you’ll need a Solana wallet.
Note: If you’re ready to dive right in, check out Brave Wallet—the secure, multi-chain wallet that’s built right into the Brave browser…and has full Solana support.
A Solana wallet enables you to store/trade/use solana (SOL), the network’s native cryptocurrency, and other Solana-based assets like SLP tokens and NFTs. (Note: uppercase “Solana” typically refers to the network, while lowercase “solana” or its abbreviation “SOL” refers to the cryptocurrency.)
Aside from storing your Solana-based assets, your Solana wallet also enables you to connect to Solana-based DApps. This is a key feature of how Web3 works: You’ll log into sites and services by connecting your wallet, as opposed to configuring a username/password combo for each site.
Learn more about using wallets to connect to Web3 DApps.
Most blockchains support multiple types of wallets, and Solana is no different. The major distinctions between crypto wallets are software vs. hardware, and custodial vs. non-custodial.
Software wallets are entirely digital. They can be accessed via your Web browser (through websites like coinbase.com, or as third-party browser extensions), or as apps that you install on your desktop or mobile device. Software wallets have the benefit of being accessible on devices that are usually connected to the Internet, for added convenience and quick accessibility. Their Internet-connectivity, however, also makes them more vulnerable to hacks and other Web3 security risks.
Hardware wallets are physical devices designed to store crucial wallet info (i.e. your private keys) offline for extra security. You’d typically only connect your hardware wallet to the Internet when you’re ready to broadcast a transaction to the network (a transaction you’ve already securely approved offline). These physical devices are either coupled with their own software, or made to be compatible with other popular software wallets. Hardware wallet makers like Ledger, for example, have their own proprietary wallet software, but can also be connected to software wallets like Brave Wallet, Phantom, and more.
Software wallets can be custodial (where a third party controls your private keys and, ultimately, the assets in your wallet) or non-custodial (where you are solely responsible for your wallet’s private keys). Hardware wallets are always non-custodial.
Learn more about the differences between software and hardware wallets, or the differences between self custody and third-party custody.
Follow these steps to get your Solana wallet up and running, and to start exploring the Solana ecosystem.
To get started with a Solana wallet, you’ll first need to decide which type (hardware or software, custodial or non) and which particular wallet to use. The best Solana wallet is one that meets your individual needs. Some of the most popular software wallets for Solana include Brave Wallet, Coinbase, and Phantom. To help you decide, here’s a snapshot of how these (plus a few others) compare on security, functionality, and more:
| Brave | Coinbase | Metamask | Opera | Phantom | |
|---|---|---|---|---|---|
| Browser native (no extension to download) | ✓ | - | - | ✓ | - |
| NFT support | ✓ | ✓ | ✓ | ✓ | ✓ |
| Available on desktop & mobile | ✓ | ✓ | ✓ | ✓ | ✓ |
| Ledger & Trezor support * | ✓ | ✓ | ✓ | - | ✓ |
| Buy, store, send, & connect to DApps on Solana | ✓ | ✓ | - | ✓ | ✓ |
| Buy, store, send, & connect to DApps on Ethereum & EVM chains | ✓ | ✓ | ✓ | ✓ | - |
| Buy, store, & send FIL on the Filecoin chain * | ✓ | - | - | - | - |
| Integrated DEX aggregator for token swaps on Solana | ✓ | ✓ | - | ✓ | ✓ |
| Integrated DEX aggregator for token swaps on Ethereum & EVM chains | ✓ | ✓ | ✓ | ✓ | - |
| Open source | ✓ | - | - | - | - |
| Crypto market data | ✓ | ✓ | - | - | - |
*Desktop only, with mobile support coming soon.
If you’re new to Web3, you may opt for a Web-based custodial wallet that supports Solana, like Coinbase. If you want a self-custody software wallet for Solana, you may prefer the browser-based Brave Wallet rather than an extension-based wallet like Phantom. If you’re a crypto expert with lots of assets to secure, you’ll likely couple your software wallet with a hardware wallet device for added security, in conjunction with a software wallet like Brave. Again, there are pros and cons—and unique security considerations—associated with each type of Solana wallet.
Learn more about the difference between extension wallets and browser-native wallets.
Once you’ve chosen a Solana wallet, it’s time to set it up. This may entail visiting a website, downloading an app, or opening the wallet that’s already built into your browser (as with Brave Wallet). Be sure to follow the documentation/instructions that your Solana wallet provides.
For detailed guidelines on setting up your new Solana wallet, you can follow our guide to set up a custodial crypto wallet or to set up a non-custodial crypto wallet.
Before using your Solana wallet, you’ll first need SOL in order to cover the fees associated with using the network. If you’ve chosen a Web-based custodial wallet, or a self-custody wallet that supports fiat-to-crypto purchases like Brave Wallet, you’ll be able to buy SOL directly with fiat currency in your bank account or a credit card (i.e. purchase SOL with USD). If you’re using a wallet that doesn’t support fiat-to-crypto purchases, you’ll need to purchase SOL in another wallet, then send it to your new Solana wallet.
Specific instructions for using a crypto wallet will vary based on the particular wallet you’ve chosen. But, in general, all crypto wallets (whether they’re custodial or non-custodial, software or hardware) will follow a similar process for sending and receiving crypto.
With your Solana wallet loaded up with SOL, you’ll be able to pay gas fees to transact on the network. You can then begin connecting to Solana DApps, trading Solana-based assets, and more. As you explore, remember to follow the best practices for Web3 security. And if you’re looking to enjoy Web3 ecosystems like Solana with Brave-level protections, try Brave Wallet. It’s a secure, multi-chain wallet that’s fully compatible with Solana—and it’s built right into the Brave browser so you can get started right away. Getting started is as easy as downloading the Brave browser, and clicking ![]() .
.
Looking to find out how to set up a custodial cryptocurrency wallet? Check out our easy-to-follow guide on choosing and setting up a custodial wallet.
Read this article →When it comes to crypto wallets, the two main options are custodial and non-custodial (aka “self-custody”). The difference comes down to private keys. In this primer, we'll discuss the pros and cons of each type, and explain how to set up a self-custody crypto wallet.
Read this article →Not sure which crypto wallet is the most secure for your needs? In this guide, we break down the different elements you should consider when choosing one.
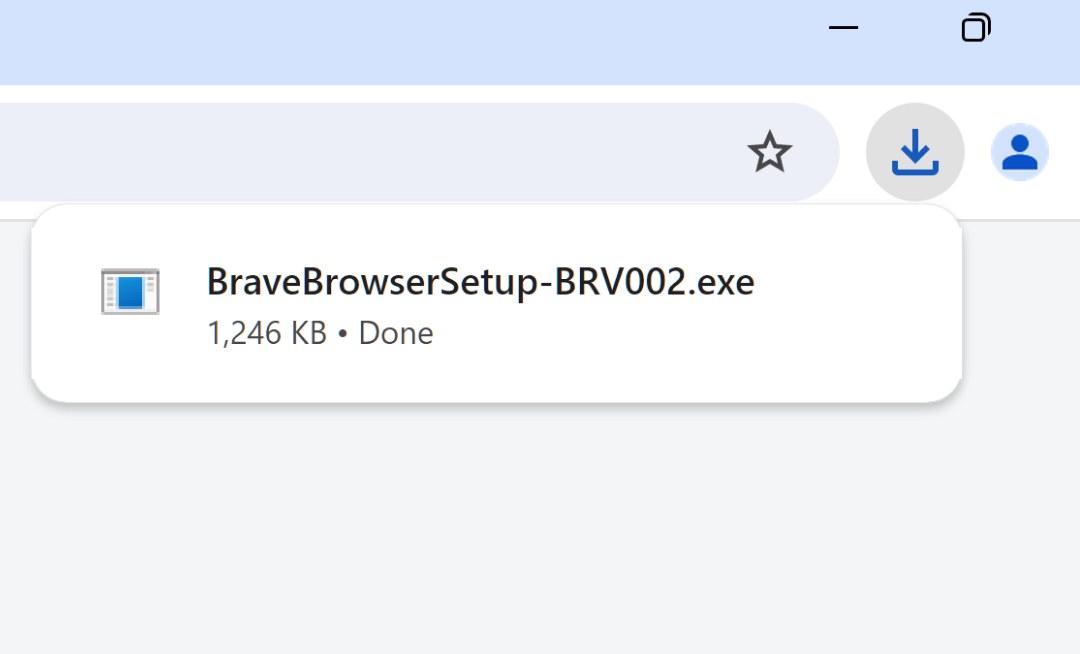
Read this article →Open the installer from Chrome's downloads (it should be in the upper right corner of this window).
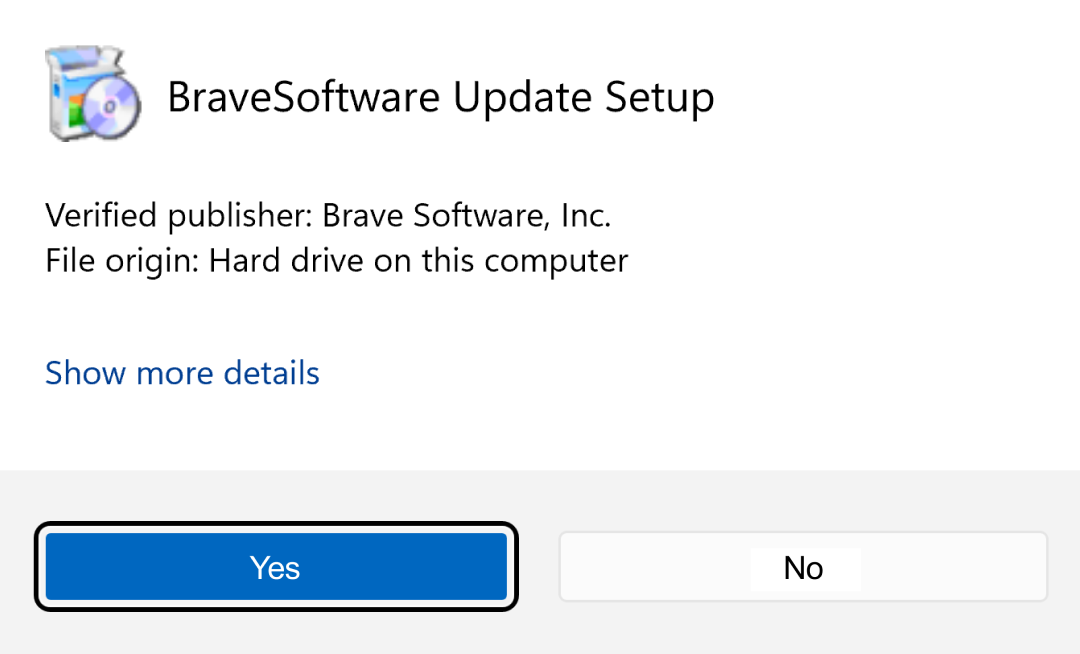
If you're prompted to, click “Yes” in the User Access Control dialog.
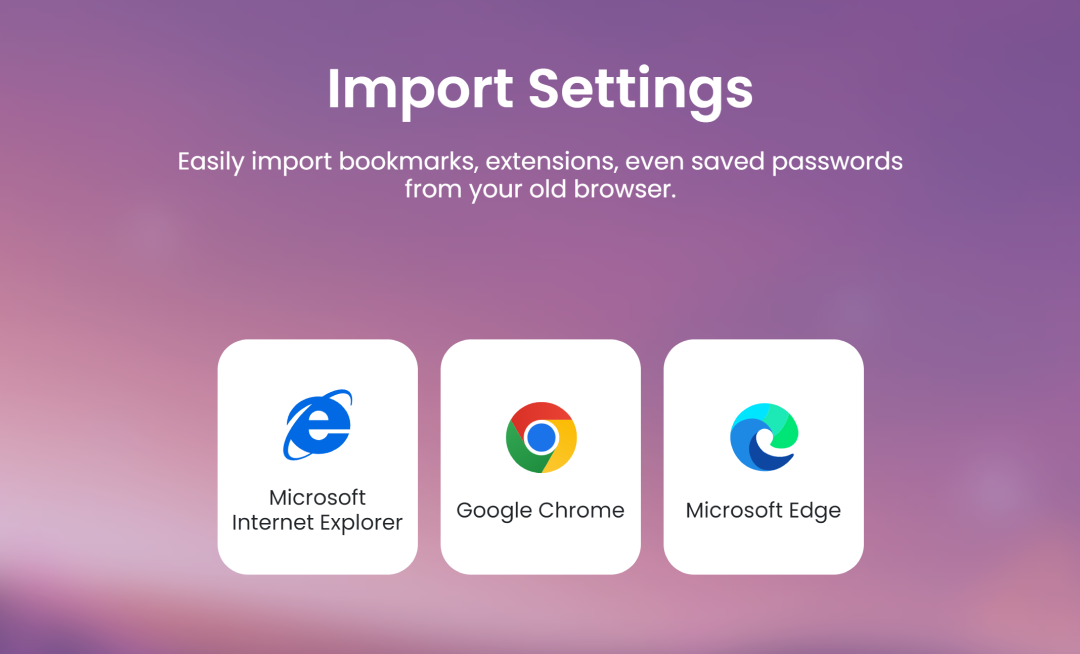
Wait for the installation to finish, then import your browser settings from Chrome.
If your download didn’t start automatically, click here.